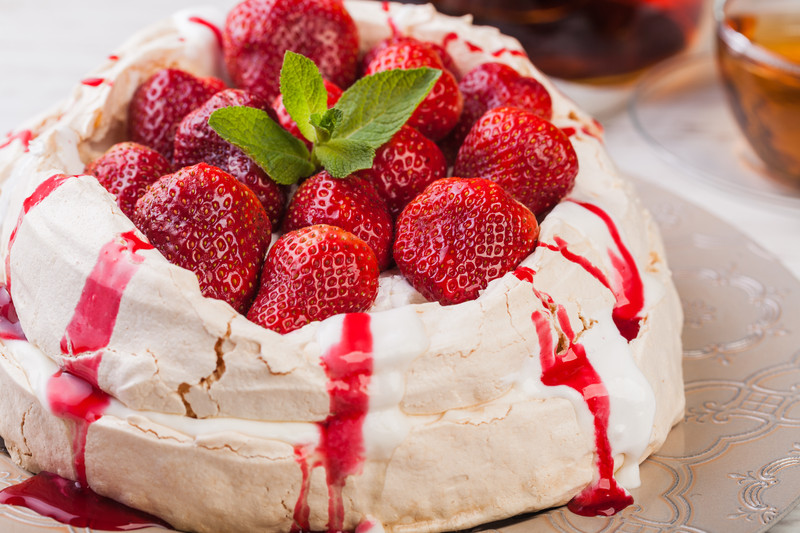
The sea of Tasmania separates two nations across it with a rich heritage some shared and majorly rivaled. While cricket and rugby are major bones of contention between Australia and New Zealand, there is another famous Trans-Tasmanian rivalry regarding the origin of a dessert-The Pavlova cake. Although it is more credited as a Kiwi creation there Aussie mates are also known to have staked claim towards its creation. What is however unanimous is that this meringue based cake was named after Anna Pavlova, the celebrated Russian ballerina. The Pavlova is thus traditionally a cake with a crisp crust outside a soft light meringue inside and often topped by whipped cream or fruits.
The pavlova in its current form finds its origin in the late 1920s with Ana Pavlova having visited Wellington in 1926 as part of her world tour. It is believed that a chef created this dish in her honour at a hotel in wellington. However meringues with creams have been in vogue for way longer. In fact meringues the heart of the pavlova is believed to be an 18th century creation from the swiss village of Meiringen. The name Meringue however is first accredited to a cookbook of 1692 by François Massialot. Nutritionally a meringue is fat free, and protein rich along with a high content of carbohydrates. The pavlova on the other hand has the added nutrients of the fruits, and the fat of the whipped cream if added. Unlike the meringue which has a solid consistency the pavlova is to have a marshmallow like soft inner core inside the crisp crust.
Most pavlovas are decorated with whipped cream and/or fruits. Our food journey today will have strawberries as our friend as we make the pavlova. Planning and preparation is important in any journey, so too in our food journey. Here however it comprises of collecting the right ingredients and prepping them before we embark on the trail. To make a cake to serve 8 people we will need:
Egg white – 4
White sugar – 1 and ¼ cup
Vanilla extract- 1 tea spoon
Lemon juice- 1 tea spoon
Corn starch – 2 tea spoons
Heavy cream – 500 ml
Strawberries – 7-8 medium sized
Take the egg whites in a bowl and beat them till they become stiff. Care is to be taken that they are not over beaten, as then they tend to deflate when folded into other ingredients, which will lead to the meringue and thus the pavlova to collapse. Now add 1 table spoon of sugar at a time and keep beating. This has to be thoroughly done and is one of the crucial elements of the preparation. The beating should leave the mix thick and glossy. Now fold this in cornstarch lemon juice and the vanilla extract ever so gently till it is evenly mixed. Now set this aside.
Line a baking sheet with parchment paper and make a 9 inch diameter circle for reference on to the paper. Pre heat an oven for 5 minutes at 150 degree Celsius. Now working from the centre, spoon out the beaten mix and spread to the edges. As you spread the mix, slightly build up the outer edge such that there is a depression round the middle. Now place this n the preheated oven and bake for about an hour. Once baked let it cool on a wire rack within the oven.
Now in a bowl beat the heavy cream thoroughly till stiff peaks start forming. Set this aside till baking is done. The strawberry is also now sliced for garnishing on the cake. Once the baking is over and the meringue is cooled, bring it out of the oven just before serving. The pavlova should now have a crisp outer crust with a slightly moist centre. Now fill the centre of the meringue with the whipped cream. You can fill a piping tube and use it to add the cream to look dainty. Add the slices of strawberries as a garnishing on top and voila your pavlova is ready.
A dish that has the heritage of Swiss confectioners and the name of a ballerina, a dish over which two proud nations like Australia and New Zealand fight over must indeed be special. In fact the pavlova is included in an advertisement from the Kiwi Insurance company NZI as among its national icons, so great is its popularity. A dish with such popularity does indeed merit an extra helping of my mom’s special ingredients-a sprinkle of love and a dash of your best smile. So go ahead as you roll your sleeves smile your best smile pour in oodles of love for the ones you cook and enjoy this yummy dessert. Bon appétit.


